Horde Defenders Getting Started
First-session checklist for a manual-aim tower defense — codes, scrap, placement, and basic tracking.
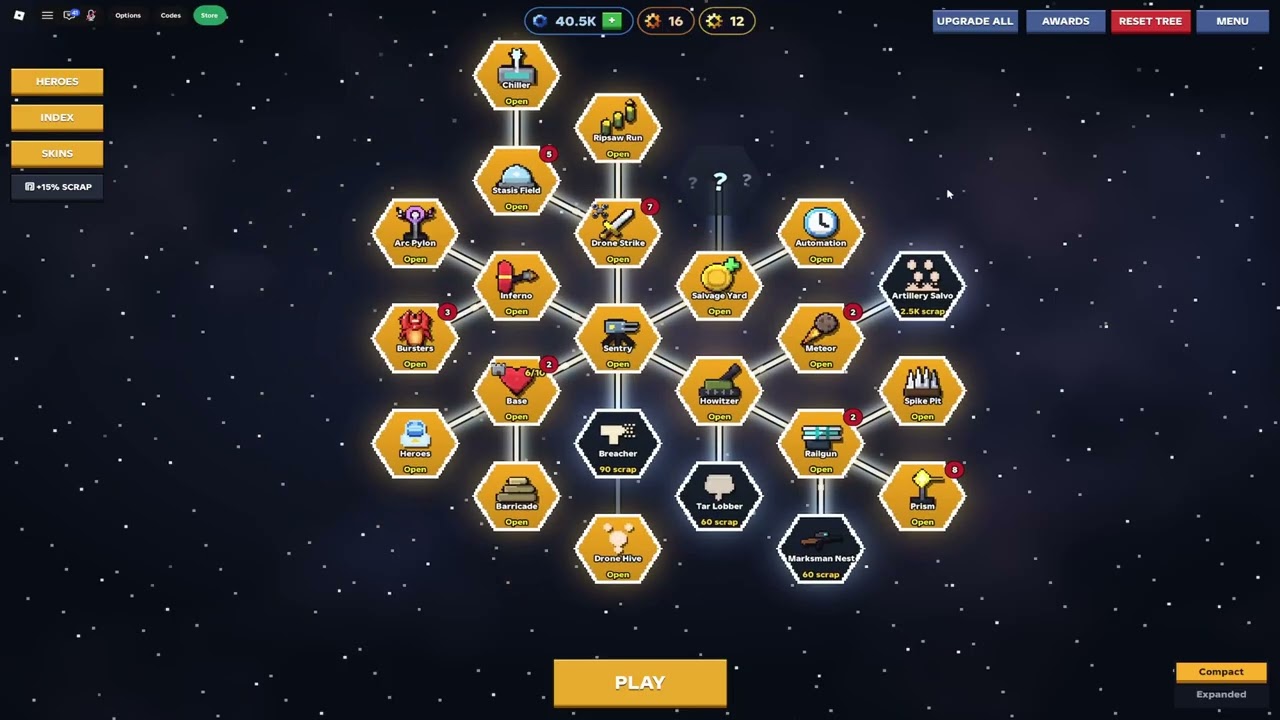
Horde Defenders throws you into an outpost surrounded by alien bugs and expects you to aim every shot. There is no auto-target safety net. This getting started guide covers the first hour: finish the tutorial, claim free rewards, place a workable defense, learn the aim loop, and know what to unlock next.
If you only remember three rules on day one: place guns on high ground when you can, keep the cursor moving with the swarm, and spend Scrap on upgrades that fix leaks instead of random cosmetics. Everything else builds on those habits.
Before your first real wave
- Launch the experience from the Roblox page and complete the short tutorial until the HUD feels familiar.
- Open Codes (upper area of the screen after the tutorial unlocks it) and redeem every active code from our Codes Hub. Step-by-step UI notes live on How to Redeem.
- Note your currencies: Scrap from kills, Gems, and timed Boosters. Scrap fuels tower placement and upgrades during runs; Gems and Boosters accelerate longer progress.
- Skim the early-game tier list so you do not dump Scrap into weak picks.
- Bookmark How to Aim and Controls for the next practice session.
Codes often grant Scrap, Gems, Boosters, or tower skins. Redeem them before you grind — free Scrap on day one lets you experiment with Barricades and a second gun without starving upgrades.
Place your first towers
Early maps teach the core loop. You are not building an idle farm; you are building a lane you can personally cover with the mouse or touch aim.
Starter gun roles
- Sentry — Reliable workhorse for learning tracking. Place it where you can see the approach clearly.
- Railgun — Stronger single-target punch once you can hold aim on elites or denser clusters.
- Howitzer — Lobbed area damage; lead moving packs and watch arc timing (deep dive in How to Aim).
- Barricade and Barbed Wire — Soft walls that slow and funnel. They buy aim time; they do not replace DPS.
- Tar Lobber — Ground control that slows bugs so your aim can catch up.
Community gameplay also shows names like Inferno, Hive, Nest, and Burst Cannon among the wider 18-tower roster. Treat those as community-reported until you unlock them yourself; alpha naming can shift.
Placement basics
- Find elevated pads first. High ground grants more range and damage — see High Ground.
- Put Barricades or wire slightly ahead of the guns so bugs bunch where your crosshair waits.
- Avoid scattering Sentries across the whole map. One covered chokepoint beats three lonely guns you cannot aim for at once.
- Leave space to add Tar Lobber or a second elevated gun after the first upgrade spike.
When a leak happens, do not panic-place five new towers. Pause (if the mode allows), identify the lane that broke, and either upgrade the covering gun or add one defensive layer on that path.
The aim loop on day one
Every tower fires where you point. Your job each wave:
- Acquire the densest column entering the kill zone.
- Track laterally as the pack moves — do not park the cursor on empty ground.
- Priority-shift to elites, flyers, or bosses when they appear, then return to the column.
- Re-center after using a strike so you do not lose the lane while the camera or HUD animates.
Spend ten minutes on a low level just practicing tracking. That practice pays more than grinding three maps with messy aim. Full technique, Howitzer leading, and target priority live on How to Aim.
Heroes, strikes, and when to unlock them
Once basic clears feel stable, look at heroes: Warden, Marksman, and Sentinel. Each can fight on AI or under your possession. Possession means you temporarily leave the pure tower-aim loop to drive a hero kit — powerful, but only if your towers can hold without constant babysitting. Read Heroes Guide and the players hub pages for Warden, Marksman, and Sentinel.
Strikes (drone strikes, meteors, ripsaws, salvos, stasis fields) are emergency buttons for clumps and bosses. Use them when a column is about to overflow the Barricade line, not the instant the cooldown appears.
Progression across 59 levels and five worlds
The campaign spans 59 levels across five alien worlds with bosses. Challenges remix rules. Endless and leaderboards wait when you want infinite waves — covered in Endless Mode. Workshop maps exist for custom layouts once you understand vanilla chokepoints.
Alpha progress systems can change. Community notes mention a tech tree that was refunded or reworked; if you see leftover UI or old guide screenshots about permanent trees, verify in your build before spending Gems. Tower upgrades and map mastery remain the safe investments.
First-session checklist
- Tutorial complete and Codes button available
- All working codes redeemed via Codes
- At least one elevated Sentry covering a Barricade funnel
- One successful clear where you consciously tracked a full column
- Scrap spent on a meaningful upgrade (range, damage, or a second defensive layer)
- Next reads queued: How to Aim, High Ground, Tier List
Common day-one mistakes
- Ignoring codes — free Scrap and Boosters matter most when your roster is thin.
- Flat-ground spam — same Scrap on high ground wins more fights.
- Static cursor — towers do nothing useful if you aim at yesterday’s bug.
- Skipping Barricades — pure DPS without a funnel makes aim harder, not easier.
- Unlocking everything randomly — follow early-game tier list priorities.
- Jumping to Endless too early — learn campaign aim and placement first.
When the first hour is done, you should clear early maps without panic, know where codes live, and understand why high ground and aim beat mindless tower spam. Move next to How to Aim and keep the Guides Hub open for the rest of the path.
Frequently Asked Questions
Quick answers to the most common Horde Defenders questions.
What should I do first in Horde Defenders?
Finish the tutorial, redeem codes, place an elevated Sentry behind a Barricade funnel, and practice tracking one bug column before worrying about advanced towers.
Where do I redeem Horde Defenders codes?
After the tutorial unlocks Codes, open the Codes button near the top of the screen, paste an active code, and press Redeem. Full steps are on How to Redeem.
Which starter towers should I buy first?
Prioritize Sentry for tracking practice, then Barricade or Barbed Wire for funnels. Add Railgun or Howitzer once you can hold aim under pressure.
Do I need heroes on day one?
Not required for the earliest maps. Unlock Warden, Marksman, or Sentinel after basic aim and placement feel stable, then read the Heroes Guide.
Why am I leaking even with many towers?
Scattered flat-ground guns split your attention. Consolidate on high ground, add a funnel, and keep the cursor on the densest column.
Is the tech tree still in the game?
Alpha systems change. Community notes say a tech tree was refunded or reworked — confirm in your current build before spending Gems on outdated screenshots.